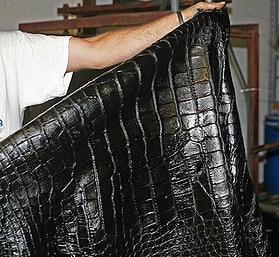
We’ve received a lot of inquiries lately as to what goes into the tanning process for alligator leather. In this post, we’ll break down the basic steps of tanning so you can get a better understanding of the procedures that goes into achieving a high-quality tanned alligator skin.
Put simply, tanning is the transitioning of a raw skin into actual leather. Without this crucial process, the skins are susceptible to bacteria and decomposition. From a high level, tanning requires these steps:
- Dry salting (for preservation)

- Beamhouse operations:
- Soaking (to cleanse)
- Liming (to descale)
- Deliming (to raise the acidity)
- Pickling (to remove bone)
- Chrome tanning (to convert from organic to inorganic)
- Shaving (to degrease & thin out leather)
- Re-tanning (to re-soften leather)
- Drying (either by hang-drying or by forced air)
- Dry cleaning (to remove excess grease)
- Coloring
- Shaving
- Finishing (to apply desired look and feel)
The Beginning Steps
When we receive the skins from the suppliers, they're rigid and extremely susceptible to being affected by the elements. They arrive salted, which is helpful, as this removes the water from the skins and preserves them until they are ready to be processed. The first stage of the process is the beaming, when we soak the skin in water to clean the skins, remove the salt and then rehydrate the skin so we can begin working them.
The Tanning Process
After this, we move onto liming — which removes scales, nails, mucins, natural greases and fats. This also splits the fibers to makes the collagen in the skin more flexible.
Next, we delime the skin to raise the acidity after the liming lowers it. The next phase is the pickling which serves as an acid bath to break down the bones and calcium in the alligator skin so it becomes even more pliable. After the pickling process comes the chrome bath which makes the skin durable and no longer succeptible to the elements. Once this is done, the alligator skin is no longer an organic material — it has become inorganic leather.
Finishing Touches
After this, we re-tan the leather, this time using vegetable-based products. This is done so that the tougher skin that is created from the initial tanning process is made supple again. We then either hang-dry or "toggle" (which uses a special type of oven to evaporate the water) to remove the water and humidity.
From there, the finishing process begins, where we dye the leather, shave it down to the required thickness and weight for the application. Then, a top coat is applied with seasons and protective agents so that it feels and looks good — and is resistant against external factors like water, light and rubbing. After this, the product goes to the manufacturer where they turn it into the garments, footwear, furniture and handbags that you're familiar with.
This is the basic overview of our tanning process and we hope it’s both informative and insightful. Should you have any questions, please feel free to comment below. And don't hesitate to contact us!


